All posts by Fraser Jones

Dynamic DNS with Unifi and cPanel

For as long as I’ve had my home lab setup, I’ve had some way of remotely connecting into it via a VPN.

Things all started with an OpenVPN server running in a VM (and some port forwarding magic) but as I’ve migrated over to newer (and simpler) VPN solutions, there is one thing that was always there – a Static IP.

In practice, Dynamic IPs don’t change often but can change at any time. The simplicity of not having to worry about this (and have to change configurations accordingly) meant a Static IP was essential.

Not all ISPs, especially those for home users, supported Static IP facilities at all – and those were usually niche suppliers and/or higher costing services.

In the last couple of years, possibly in part due to the IPv4 pool shortages, this small pool has further diminished. This includes my current supplier, who is no longer offering new customers a Static IP option. It remains for existing customers at the moment (including myself), but it is only a matter of time before this changes.

Another solution is needed.

Dynamic DNS

The obvious option, which often gets suggested is Dynamic DNS (DDNS). This creates a hostname and links it to your Dynamic IP (which must be updated if it changes).

There are many services which offer this both free/commercially, you’d set-up an account and be provided with a hostname (usually a subdomain under the domain of the service) and some software/configurations to handle updates.

There is another option if you have a Ubiquiti setup and cPanel hosting service for your domain.

To do this you need the following:

  • A Ubiquiti router – it needs to handle the connection to your ISP directly (I have a Ubiquiti Cloud Gateway Ultra)
  • A cPanel based hosting service – it needs to be managing the DNS of your domain name, it also needs to be enabled by your hosting service. If you see the Dynamic DNS option you should be good.

Setting up a Dynamic DNS sub-domain

To setup a Dynamic DNS domain, it’s really simple.

In the Dynamic DNS option, create a new domain:

Make sure to leave the optional IP field blank – this should be populated automatically in the next step and should allow you to check the configuration is working.

When done, the entry will be created with an IP listed as None and you should see a URL in the format:

https://<domain-name>/cpanelwebcall/<long-string-of-characters>

Keep this handy as you’ll need it in the next step.

Setting up Dynamic DNS in Ubiquiti

To setup the Dynamic DNS link, in your Unifi Controller interface go to Settings. Click on Internet, then click on your WAN interface (the one your internet is on).

In this screen find the Dynamic DNS option on the screen and open the dialog to add a new entry. In the screen, select Custom for the Service type and fill in the details as follows:

  • Hostname – this should be the part of the URL after the domain name
  • Username/Password – this can be anything as it’s isn’t used (but is required)
  • Server – this should be the domain name the Dynamic DNS will be on (from the URL) – don’t include the https:// prefix.

When done click Create and then Apply Settings at the bottom. This should automatically trigger a push of the IP to the DDNS service and an update whenever the IP changes.

To check this worked, look at the Dynamic DNS screen in cPanel and the None in the IP field should have changed to your external IP. You can also perform an nslookup on your DDNS domain and confirm your external IP is returned (this may take a bit of time to propagate).

Keeping Score

Well then, almost a year since my last post here… and what a year it’s been…

Recently I’ve started watching a show called The Good Place on Netflix, it’s a great show (and is highly recommended by me), but more-over the initial concept of a points-based system measuring the good and bad things you do in your life struck me as a very interesting way of viewing life.

In the points system from the show, you gain points for the ‘good’ things you do in your life, and lose points for the ‘bad’. How many points depends on how good/bad the thing you do is – the ‘value’ of that event/action.

If you extend this scoring mechanism to include things that happen to you, outside of your control, and you can get a fairly accurate idea for how things are going for you.

For me, this year (and the year before), the negatives have outweighed the positives (sometimes by a considerable margin).

That’s not the whole story though, you can’t sum things up to a simple number. In the show, a positive/negative value can be assigned to things that you do (and how good/bad they are can be quantified by their effect on others) but how do you assign a value to something that happens to you. The ‘value’ of that and how good/bad it is can only be determined by its effect on you.

So, how do you improve your score when it’s affected by things that happen to you? Simple – reduce the ‘value’ by changing the impact things have on you.

Some would say you can’t do this – and for some ‘things’ that’s right, you can’t… but that’s not the case for all things.

Does a certain place/situation affect you negatively? Leave that place/situation. It may not fix the situation but it will reduce the value of it (maybe to 50 points instead of 100… but less). The longer you are out of the place/situation, the lower the value will go, until eventually it has almost no value compared to your score as a whole.

Who knows – maybe your negative will end up as a positive in the long run…

Sky Q Mini Box Problems – Fixed

I’ve had Sky Q for a couple of months now – one Sky Q Silver box and a Sky Q Mini box. The main Sky Q Silver box has been (relatively) problem free. The Sky Q Mini box however… less so…

The litany of woes that I’ve endured from the Sky Q Mini box have been:

  • The box refusing to come out of standby
  • The box coming out of standby fine but crashing straight away (no menu appears)
  • The box appears to work correctly however when channel surfing or playing back recordings, the screen will go blank and it’ll freeze up

This isn’t an exhaustive list but covers the main issues

I went through several steps trying to resolve the issue but the only once which seems to have had a positive effect is doing a full reinstall of the box software. I got the details for this process from this help page (link), specifically the Your Sky Q Mini box has a message saying “To update the software on your Sky box, please go to Sky.com/softwareupdate and follow the instructions.” section.

My box is already connected via Ethernet (and to a TV) so I was able to modify the instructions slightly but to perform the reinstall/refresh, the basic steps are:

  1. Put the box into standby and then unplug it.
  2. Ensure the box is connected to the internet via an Ethernet (wired) cable. Test the cable by plugging it into your laptop first (remember to turn off wireless on the laptop for a proper test!). Optionally, you can connect the box to a TV too.
  3. Press and hold the power button on the front of the Sky Q Mini box and while holding the button down, plug in the box.
  4. If a TV is connected, keep the button pressed until a message indicating the software is being updated appears onscreen. If you don’t have TV connected, hold the button down for at least a minute after you plug it in (normally it shouldn’t take this long)
  5. While the update is in progress, the light on the box will remain red, not amber.
  6. When complete, the box will restart into the Sky software. When the reboot is complete, the light on the box will change to amber.
  7. Move the box back to it’s previous location (if applicable).

NOTE: You should not unplug the box during the update, it’ll take a while so once it’s started, walk away and leave it run.

After following these steps, the Sky Q Mini box has only crashed once and has been stable since.

If this doesn’t work for you, I’d get in touch with Sky and get them to replace it.

Anker Products

I don’t usually write reviews but I’ve just received my second Anker product – a USB-C to USB 3.0 Cable (3ft).

I’ve got to say that the attention to detail that goes into Anker products (this one and the Anker Ultra Slim 4-Port USB 3.0 Data Hub I already own) is second to none.

NOTE: I wasn’t paid in any way for this, just a Anker fan

OpenVPN on CentOS 7

I’ve got OpenVPN installed on a CentOS 7 box. It’s configured as a routed IP tunnel (“tun”) as instead of an ethernet tunnel (“tap”).

It works great. Apart from one thing…

OpenVPN tries to start before the networking on the box is up…

This makes no sense to me. I’m not sure if it’s a systemd thing or something else.

In any case, if you have this problem, a restart of the OpenVPN service/daemon should do it:

systemctl stop openvpn@server.service
systemctl start openvpn@server.service

To speed things up I wrapped this up in a handy script.

Problem solved.

Upgrading ESXi – Latest Update

In November, ESXi 6.5 became available to users of the free vSphere Hypervisor.

As a user of ESXi 6.0 and having several failed upgrade attempts already, I was not optimistic about an attempt to upgrade to 6.5.

In addition, I was never able to determine why the upgrades were failing so no way of preventing it happening again!

My ESXi installation is on a USB drive so all I had to do was swap it for a new blank stick (allowing me to instantly go back if it all goes wrong).

After performing a new clean installation of ESXi 6.5, I was up and running within 10 mins. Then another 10 minutes of individually attaching the VMs to the new installation.

All finished and fully upgraded to 6.5.

Until the next upgrade anyway…

Upgrading ESXi

At the moment I have an Lenovo ThinkServer TS140 running VMware vSphere Hypervisor (ESXi).

It’s running the first released build of v6 – ESXi-6.0.0-2494585-standard.

Upgrading to the next version should be straightforward. Boot the installer disc and perform an upgrade to the new version.

esxiblog-confirmmsg

Unfortunately, it isn’t as easy as that – the installation fails each time with the same message:

esxiblog-installerror

Rebooting the server back into the old ESXi version works fine. Repeating the upgrade process unfortunately doesn’t work as the option to Upgrade is no longer available since the ESXi installation is no longer detected at all!

I’ve resolved this issue by logging onto the host via SSH and copying the content from /bootbank to /altbootbank.

This gets me the Upgrade option back in the installer but unfortunately it just fails again at the same point with the same error.

Looks like an full, clean ESXi reinstall is required. How can I do this and retain my settings though?

I applaud the decision to make a free ESXi edition for users such as myself but am astounded that there aren’t even the basic tools to administrate it!

The officially provided tools don’t support all the features of the free ESXi, so in order to do certain things you need the commercial Web Client, there is no VM backup support beyond a basic file backup of the VM data files and seemingly no way of backing up the server configuration at all.

It looks like an old fashioned “write down the settings” and manually restoring them after a clean install is going to be necessary. Hope that upgrading is worth it after all of this!

One Month with Sky Q

I’ve been a customer of Sky for TV since Jan 2010 and have using the same Sky+HD box (DRX890) since then. When I saw an offer for Sky Q (Silver plus one Mini box) for £30 each upfront, I jumped at it.

Why Sky Q?

I chose to go for Sky Q for a few reasons: mainly the ability to have access to TV in other rooms of the house. Without having to have another satellite feed installed in that location. Freeview isn’t an option due to an almost non-existent signal. You can get a basic signal if you run it through two signal boosters – and even then it is very unstable and you don’t receive all the channels. Satellite doesn’t have these concerns so Sky Q is an obvious choice.

In addition to this primary reason – I’m also a big fan of technology so the idea of having a brand new “cutting edge” system appealed greatly. The ability to copy recordings from the box to a mobile/tablet device also appealed, as well as being able to stream channels to those same devices.

First Impressions

My first impressions of Sky Q were good on the whole.

The interface is fast, fluid and responsive. It is also consistent between the devices – even on mobile/tablet devices when you can reasonably see that interfaces would need to be significantly adapted, the fundamental design is the same.

The new touch remote is also very useful, it was tricky to get used to initially but once you figure it out, it’s a lot faster to use regularly. You also get a traditional IR remote for the box which is useful to have around (and I assume should also work as a spare for the Mini box, although I haven’t tried that out).

I had one Mini box installed on a smaller TV upstairs – this works great for the most part. I’ve had some problems with it losing it’s settings and insisting on going through “setup” again – this would be fine if it was connected wirelessly (as recommended by Sky) however connecting it via Ethernet causes problems in setup. More about this in the next section.

The tablet app works tremendously well and I can watch whatever I want – live TV, catch up or recordings from the box. I’ve also turned off a recording downstairs and resumed it on my tablet without much of a problem.

Ethernet vs Wireless

Sky recommend that Sky Q is connected up via the home wireless network. I assume that this is due to the fact that it is “easier” and does not require a wired connection. Therefore it is “simpler” for less tech savvy users (and faster to install).

There is nothing wrong with doing this, the boxes both have Ethernet ports however it is a “non standard” installation and isn’t the preferred method of install. So “non-standard” that my installer had to call to get permission to install the system that way. I thought that was a bit much.

A wired installation is much easier for me since my home is already fully wired plus I’d heard of problems with the way Sky Q handles wireless communication from other users of my wireless AP – stories of wireless networks being crippled by the Sky Q devices misbehaving and messing with signals. I wanted to avoid that.

It should be noted that in order to do this properly we had to disable the wireless networks (both 2.4GHz and 5GHz) on the Sky Q Silver box AND the Sky Q Mini box. In addition, I had to turn ON the wired connection on the Sky Q Mini box (this only affected the Mini box, it was enabled on the Silver box).

One major problem with this is, despite wireless being turned off in the settings, when the Mini box forced me to go through setup again, it waited several minutes for a wireless connection from another box before “finding” it on the wired connection. This is pointless, if a wired connection is there, it should just use that (surely?)

The Problems

While the benefits of Sky Q and big – there were some teething issues and quite nasty bugs. Most required a forced reboot which was luckily quite quick to complete but still annoying.

The Silver box is pretty stable apart from 2 issues early in the first few weeks.

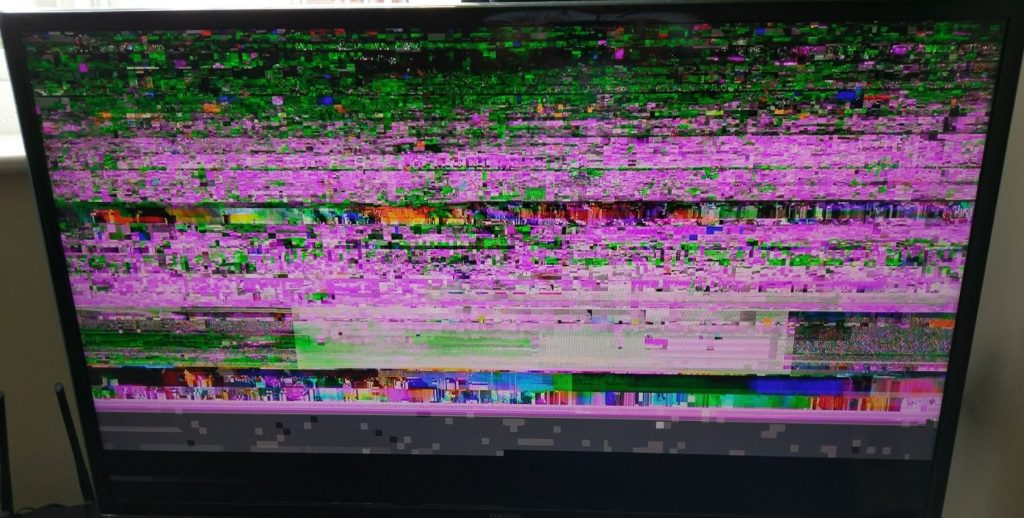
The first problem was that the box refused to come out of standby – this was fixed by a reboot. The second was a little bit nastier – the box came out of standby fine, and all appeared well but (a) I couldn’t watch any channel apart from Channel 4 – you could change the channel but no picture appeared apart from on Channel 4 (SD only), and (b) you couldn’t play back any recordings, you could try but all you’d get is a blocky mess, like this:

20161022_skyq_blockymess

After rebooting for these problems, everything has been fine recently, far more stable recently when compared.

The Mini box however has been far more problematic.

Discounting the few hours I couldn’t get it to work at all (couldn’t see the Silver box) which turned out to be that one of the network cables linking upstairs with downstairs (where the Silver box was) had become disconnected (oops).

The box crashes every few days – usually the main symptom of this is that it refuses to come out of standby when you want to use it. A reboot always solves this but it happens far too regularly. 50% of the time you have to go through “setup” again on the Mini box, which slows things up further, especially due to the wireless oddity mentioned above.

Another curious one is the “missing menu” bug – where the box does come out of standby and starts showing a live channel in a small window but no menu. And the box freezes forcing you to reboot it to get back in. It looks something like this:

20161022_skyq_miniboxcrash

Hint: You can still watch the channel displayed if you want to hold off rebooting for a while!

The only other bug I’ve seen is occasional errors downloading on demand shows due to “No subscription” – which is obviously wrong.

Completing the Experience

A couple of things I’d like to see added to the Sky Q ecosystem to “complete” the experience (and stuff I’d like fixed):

  • More “apps” to be added including 3rd party ones like “Plex”
  • Never Miss facility available via the box
  • Watching episodes via the tablet doesn’t download the next episode of shows automatically like it does on the box
  • Watching individual episodes causes it to download the next episode even when you only want to watch one episode – a toggle to turn it off on a series-by-series basis might be nice.

Conclusion

Sky Q is a great system, needs a bit of polish but all the parts are there. A couple of bugfix updates along, I think we’ll have a solid system.

I’ve read about people going back to the old Sky+HD system after unsuccessful attempts to upgrade to Sky Q but I’ll be sticking with it.